DIY gifts
My christmasgiftrumba started awhile ago. I´m far ahead this year. Which is good, much less stress! I haven´t been doing anything like too christmasy tho, no christmasmusic, decors or anything that crazy. But as i said. Stressless waiting for holidays guaranteed. Anyway, to the topic!
If i could say, fortunately, i don´t have too many people to give presents. We have a small family, and it was never my cup of tea to give presents to friends, especially last few years when i haven´t had any friends who i´m that close with. Yea i know. I´m just unpleasant person.
Don´t get me wrong, i love giving presents to others, but the thing is always The Money. AH our best friend and worst enemy, hah. So yea, it happens to take a lot of money, this whole christmastime thing. And that is actually the mainreason i like to make gifts by myself. But that´s not the whole story, i loove crafts and making aesthetic things! And i would appreciate handmade gifts over any others myself. Hopefully my family thinks the same way, or atleast doesn´t completely hate my shit!
I always try to come up with semi-long list of ideas, by scrolling pinterest and blogs, and then i start to think more closely which would make good gift to who. I make usually around 5 small gifts per person.
In this post i will show three ideas, every of them are the kind you can make long before christmas. I will be making treats and stuff then in december or something.
And these are not my inventions, and no, i don´t know who´s the OG around with these. Well, these are possibly not that unicue pieces that it would matter either. But here we have...
Floralsoap
Or just soap in general. There is so many thing to stick in that melted goodness! I took pretty simple way with these, i used (for 3 medium-size):
-Around 4dl soapmass
-1dl dried flowers (rose and cornflower)
-Few drops of vanillascent
Then what you will have to do, is melt soapmass in heatproof bowl above boiling water. Add your chosen ingredients. Pour into some kind of form. I made just basic rectangle, but if you want to give some more christmas spirit to yours, you can use cookie cutter as a shape!
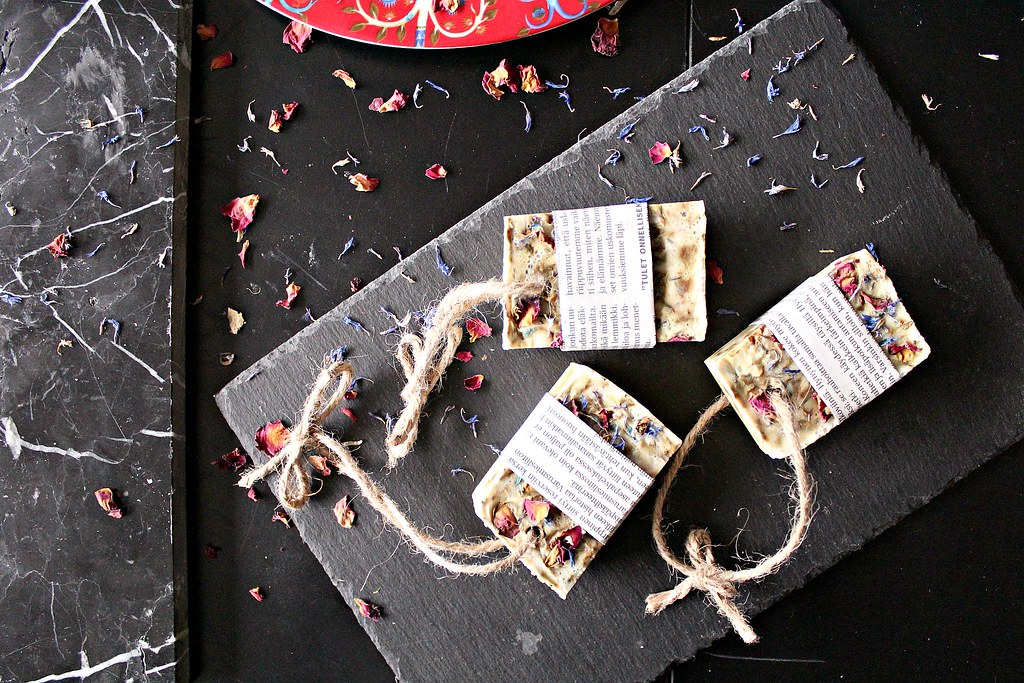
I will put some text with DYMO when i get it back from my sister. That will finish! Very simple and fast to make.
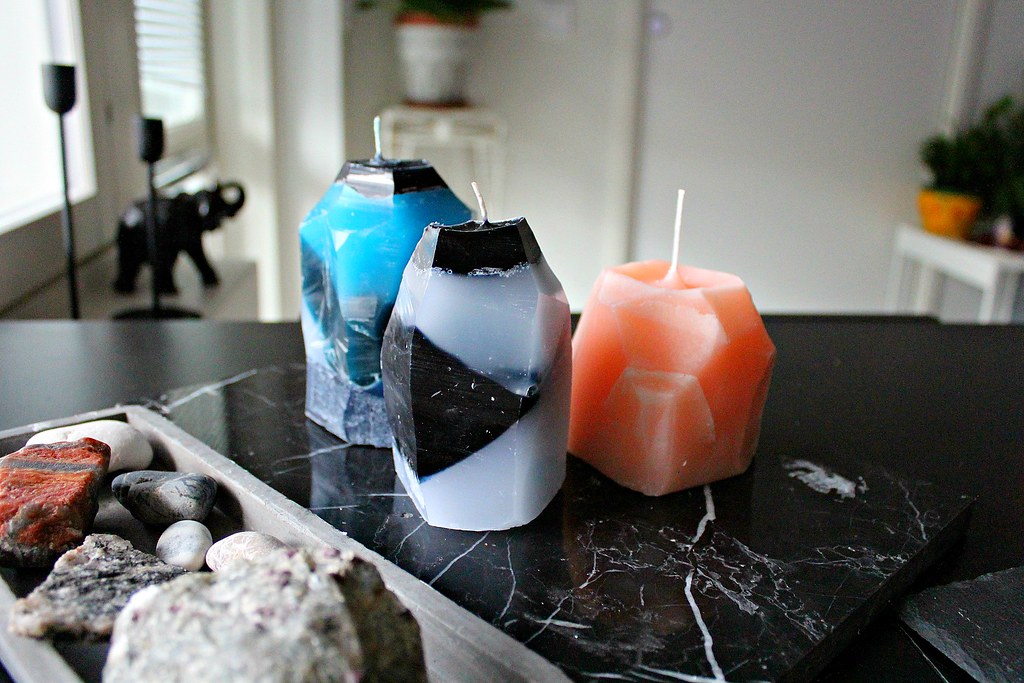
Gemstone candle
I am obsessed with this shape. And now when i think about it, i saw one tutorial from a girl who claimed this to be originally her idea (just when i said none of these are those kinda) but i just can´t remember the blog. Hey girl if for some oddest reason you find yourself from here and get mad at me for not giving u credit, tell me and i will definitely give!
Anyway, the candles. I took the easiest path again, used old candles and old wicks from them. As a form i had milkcartons, and then i just shaped little from here and there with knife. They could have turned out prettier for my opinion and i´m actually not sure yet if i will give them away, i like them enough myself, but not sure if they are gift quality.
You will need:
-Bunch of old candles
-Wick (possibly from old candles, if no, you can buy or make your own by searching instruction from pinterest, where else!)
-Candlecoloring, if needed. I had black and blue, pink is from old candle.
-Heatproof bowl that you don´t mind getting all steariny
-Pot
-Knife (and again, not your best masterchef one)
-Forms (something big enough that there is something to cut off when shaping! Milkcarton was pretty good size.)
-Some kind of stick, pen will do
Now, if you want to make candles with different colors. Place some part of the candles into your chosen bowl and melt above boiling water. At the latest now you have to attach wick to the form. That will happen easiest by taking a piece of tape, or glue, hot glue, whatever, and stick the wick to the bottom of the form. Then tape or roll the wick around that stick you have so that it will stay still while the candle is hardening.
When all the candle is melted, add color. Then pour into form. Place into freezer and now, if you want the colors not to go on straight line, same way as i did my candles, you need to place the candle to oblique position, you can choose way!
Then melt another layer and repeat everything. Layers will harden just in minutes in freezer, so don´t worry, you can melt layers right after each other.
At last, let the candle harden for good, hours or even over night.
Then you can shape it the way you want.

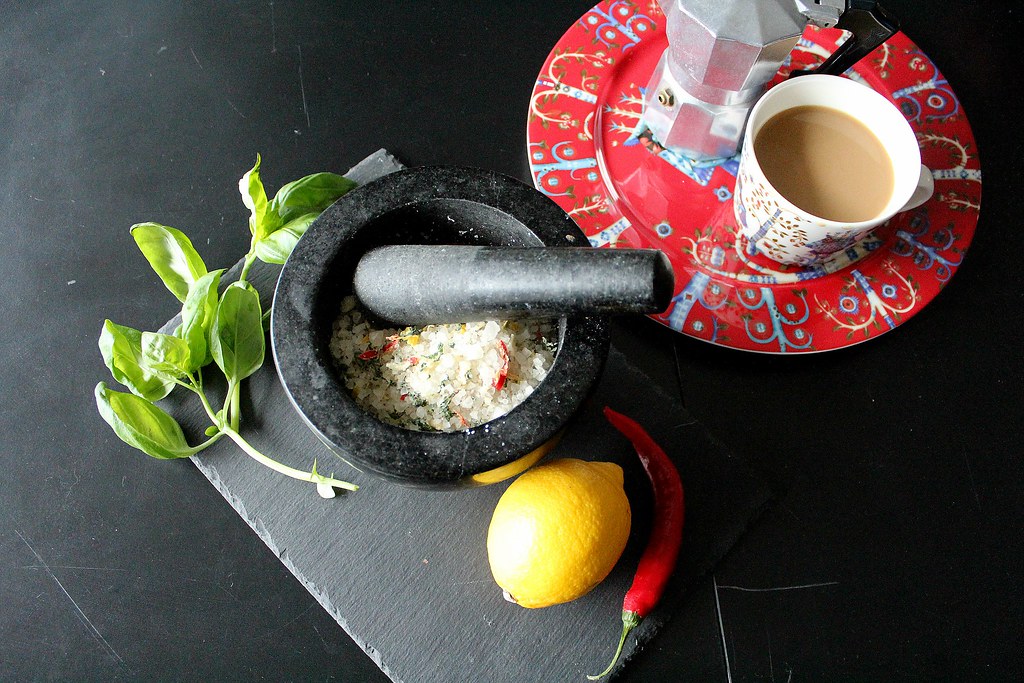
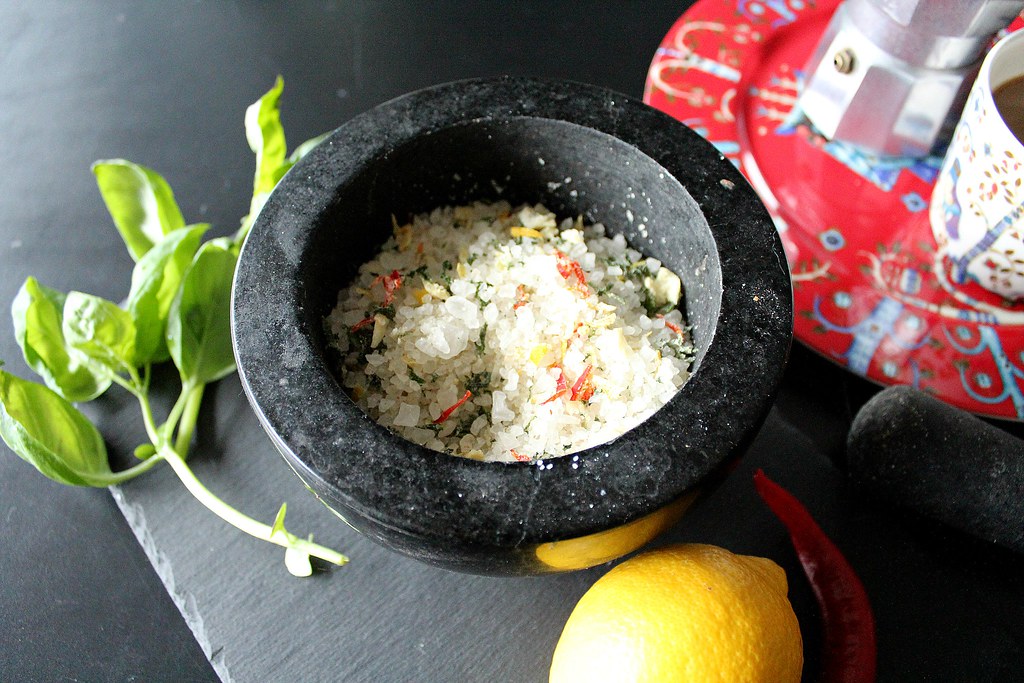
Seasoned salt
Beautiful jar filled with this colorful and also fragrant salt will make a perfect little gift for some culinaristic.
In my jar i had:
2dl Seasalt
1dl basil leaves
1dl lemon balm leaves
1/2 lemon
1/2 chili
1 carlic clove
Peel the yellow part off of lemon.
Shred all ingredients to small pieces and blend with salt. Give it a good rub or even put in a blender for few seconds so that the salt will soak in some flavors. Sprinkle on baking tray and dry. If you want to make it snap, dry in the oven about 2hrs in 50 degrees. Or then airdry 1-2 days on the table.
When it´s all dried, you can place it into jar or however you want to pack it.
I made my testpart in the oven, and it turned out just fine, but i do believe that airdrying will spare the flavors and quality better. I´m actually airdrying my second round right now, and it does give awesome smell to the kitchen!
I wasn´t particularly in the mood for writing, so the text might be weird and sticky. But i wanted to share these DIYs, and i had actually really much fun taking these pictures today! I felt so professional haha.
But that´s all for now, bye!
If i could say, fortunately, i don´t have too many people to give presents. We have a small family, and it was never my cup of tea to give presents to friends, especially last few years when i haven´t had any friends who i´m that close with. Yea i know. I´m just unpleasant person.
Don´t get me wrong, i love giving presents to others, but the thing is always The Money. AH our best friend and worst enemy, hah. So yea, it happens to take a lot of money, this whole christmastime thing. And that is actually the mainreason i like to make gifts by myself. But that´s not the whole story, i loove crafts and making aesthetic things! And i would appreciate handmade gifts over any others myself. Hopefully my family thinks the same way, or atleast doesn´t completely hate my shit!
I always try to come up with semi-long list of ideas, by scrolling pinterest and blogs, and then i start to think more closely which would make good gift to who. I make usually around 5 small gifts per person.
In this post i will show three ideas, every of them are the kind you can make long before christmas. I will be making treats and stuff then in december or something.
And these are not my inventions, and no, i don´t know who´s the OG around with these. Well, these are possibly not that unicue pieces that it would matter either. But here we have...
Floralsoap
Or just soap in general. There is so many thing to stick in that melted goodness! I took pretty simple way with these, i used (for 3 medium-size):
-Around 4dl soapmass
-1dl dried flowers (rose and cornflower)
-Few drops of vanillascent
Then what you will have to do, is melt soapmass in heatproof bowl above boiling water. Add your chosen ingredients. Pour into some kind of form. I made just basic rectangle, but if you want to give some more christmas spirit to yours, you can use cookie cutter as a shape!
I will put some text with DYMO when i get it back from my sister. That will finish! Very simple and fast to make.
Gemstone candle
I am obsessed with this shape. And now when i think about it, i saw one tutorial from a girl who claimed this to be originally her idea (just when i said none of these are those kinda) but i just can´t remember the blog. Hey girl if for some oddest reason you find yourself from here and get mad at me for not giving u credit, tell me and i will definitely give!
Anyway, the candles. I took the easiest path again, used old candles and old wicks from them. As a form i had milkcartons, and then i just shaped little from here and there with knife. They could have turned out prettier for my opinion and i´m actually not sure yet if i will give them away, i like them enough myself, but not sure if they are gift quality.
You will need:
-Bunch of old candles
-Wick (possibly from old candles, if no, you can buy or make your own by searching instruction from pinterest, where else!)
-Candlecoloring, if needed. I had black and blue, pink is from old candle.
-Heatproof bowl that you don´t mind getting all steariny
-Pot
-Knife (and again, not your best masterchef one)
-Forms (something big enough that there is something to cut off when shaping! Milkcarton was pretty good size.)
-Some kind of stick, pen will do
Now, if you want to make candles with different colors. Place some part of the candles into your chosen bowl and melt above boiling water. At the latest now you have to attach wick to the form. That will happen easiest by taking a piece of tape, or glue, hot glue, whatever, and stick the wick to the bottom of the form. Then tape or roll the wick around that stick you have so that it will stay still while the candle is hardening.
When all the candle is melted, add color. Then pour into form. Place into freezer and now, if you want the colors not to go on straight line, same way as i did my candles, you need to place the candle to oblique position, you can choose way!
Then melt another layer and repeat everything. Layers will harden just in minutes in freezer, so don´t worry, you can melt layers right after each other.
At last, let the candle harden for good, hours or even over night.
Then you can shape it the way you want.
Seasoned salt
Beautiful jar filled with this colorful and also fragrant salt will make a perfect little gift for some culinaristic.
In my jar i had:
2dl Seasalt
1dl basil leaves
1dl lemon balm leaves
1/2 lemon
1/2 chili
1 carlic clove
Peel the yellow part off of lemon.
Shred all ingredients to small pieces and blend with salt. Give it a good rub or even put in a blender for few seconds so that the salt will soak in some flavors. Sprinkle on baking tray and dry. If you want to make it snap, dry in the oven about 2hrs in 50 degrees. Or then airdry 1-2 days on the table.
When it´s all dried, you can place it into jar or however you want to pack it.
I made my testpart in the oven, and it turned out just fine, but i do believe that airdrying will spare the flavors and quality better. I´m actually airdrying my second round right now, and it does give awesome smell to the kitchen!
I wasn´t particularly in the mood for writing, so the text might be weird and sticky. But i wanted to share these DIYs, and i had actually really much fun taking these pictures today! I felt so professional haha.
But that´s all for now, bye!


Kommentit
Lähetä kommentti